Cloud9
In this class we will use Amazon Web Services and the Cloud9 web-based IDE to provide a common development and testing environment.
AWS Account Setup
Through your enrollment in this class you will receive $100 in AWS credits; these should be used only for the purposes of the class itself and should be plenty to complete your work. If you spend more than the available credits, you will need to pay for them out of your own pocket, so be careful not to leave expensive resources running!
You should have received an email with the subject Your AWS Educate Application, which contains information about how to create an AWS Educate account.
Accessing Resources
To access your AWS Console, go to:
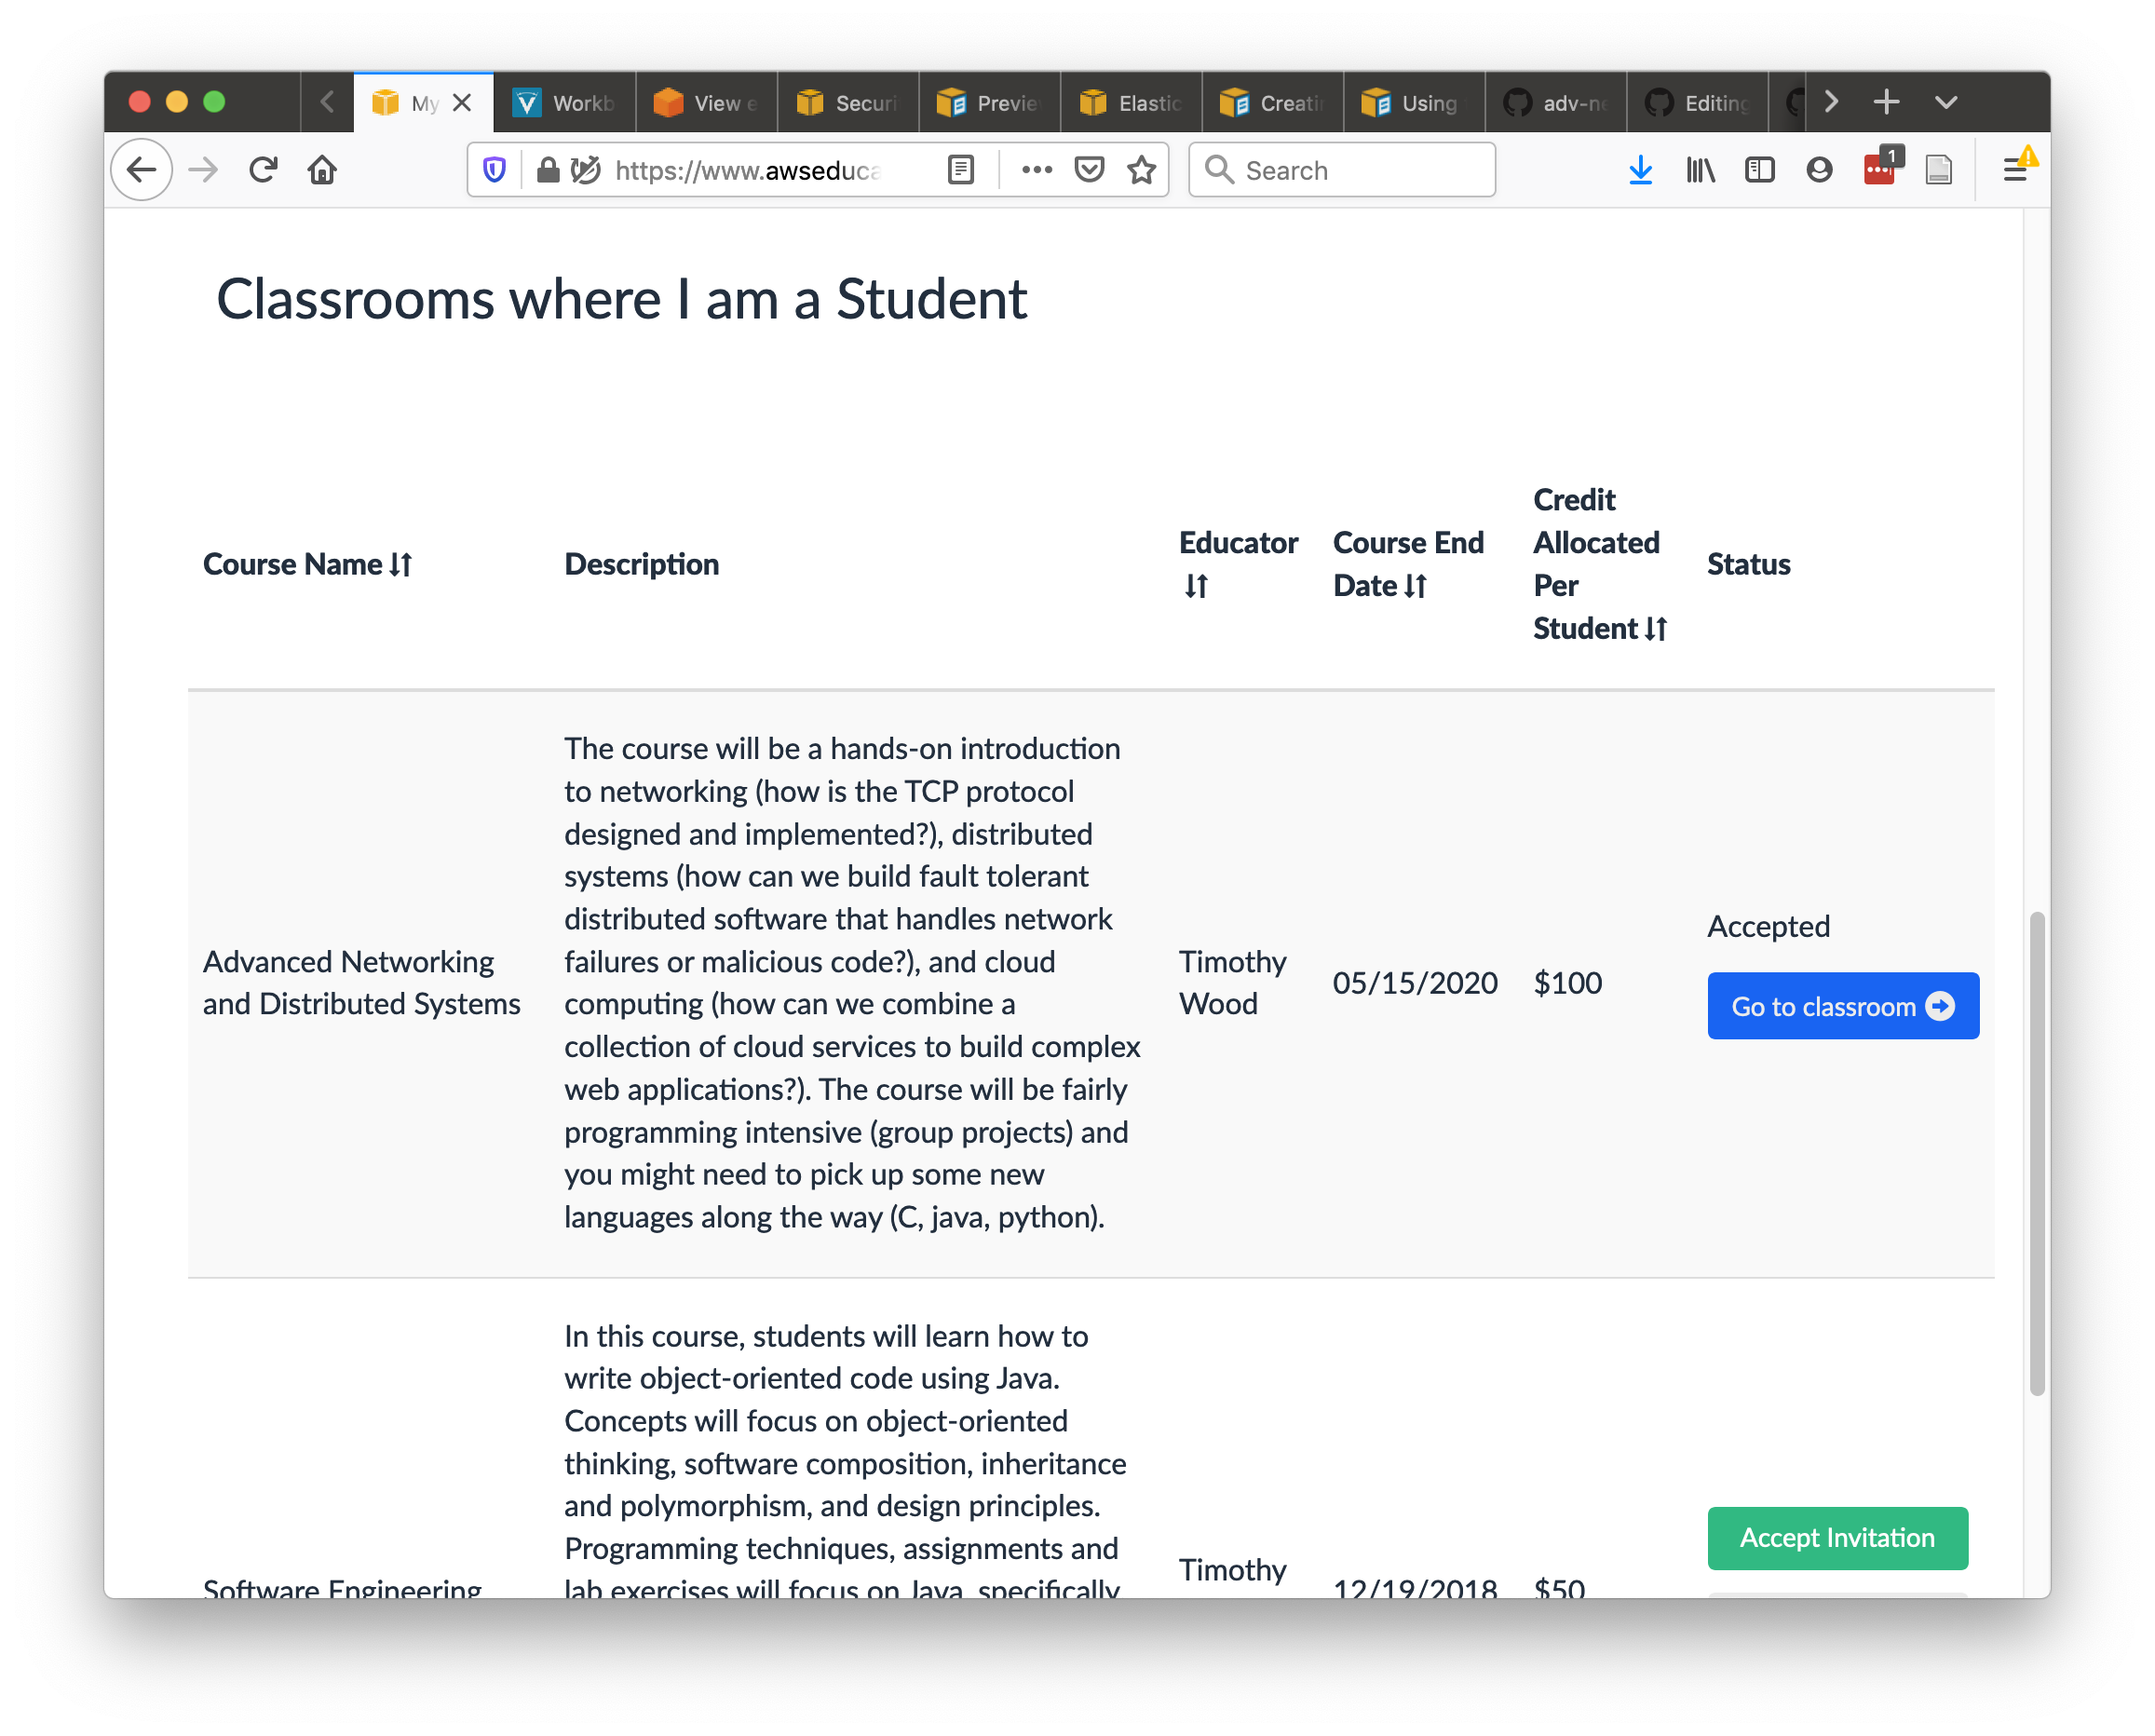
- Click on the link for My Classrooms and then pick the course from the list.
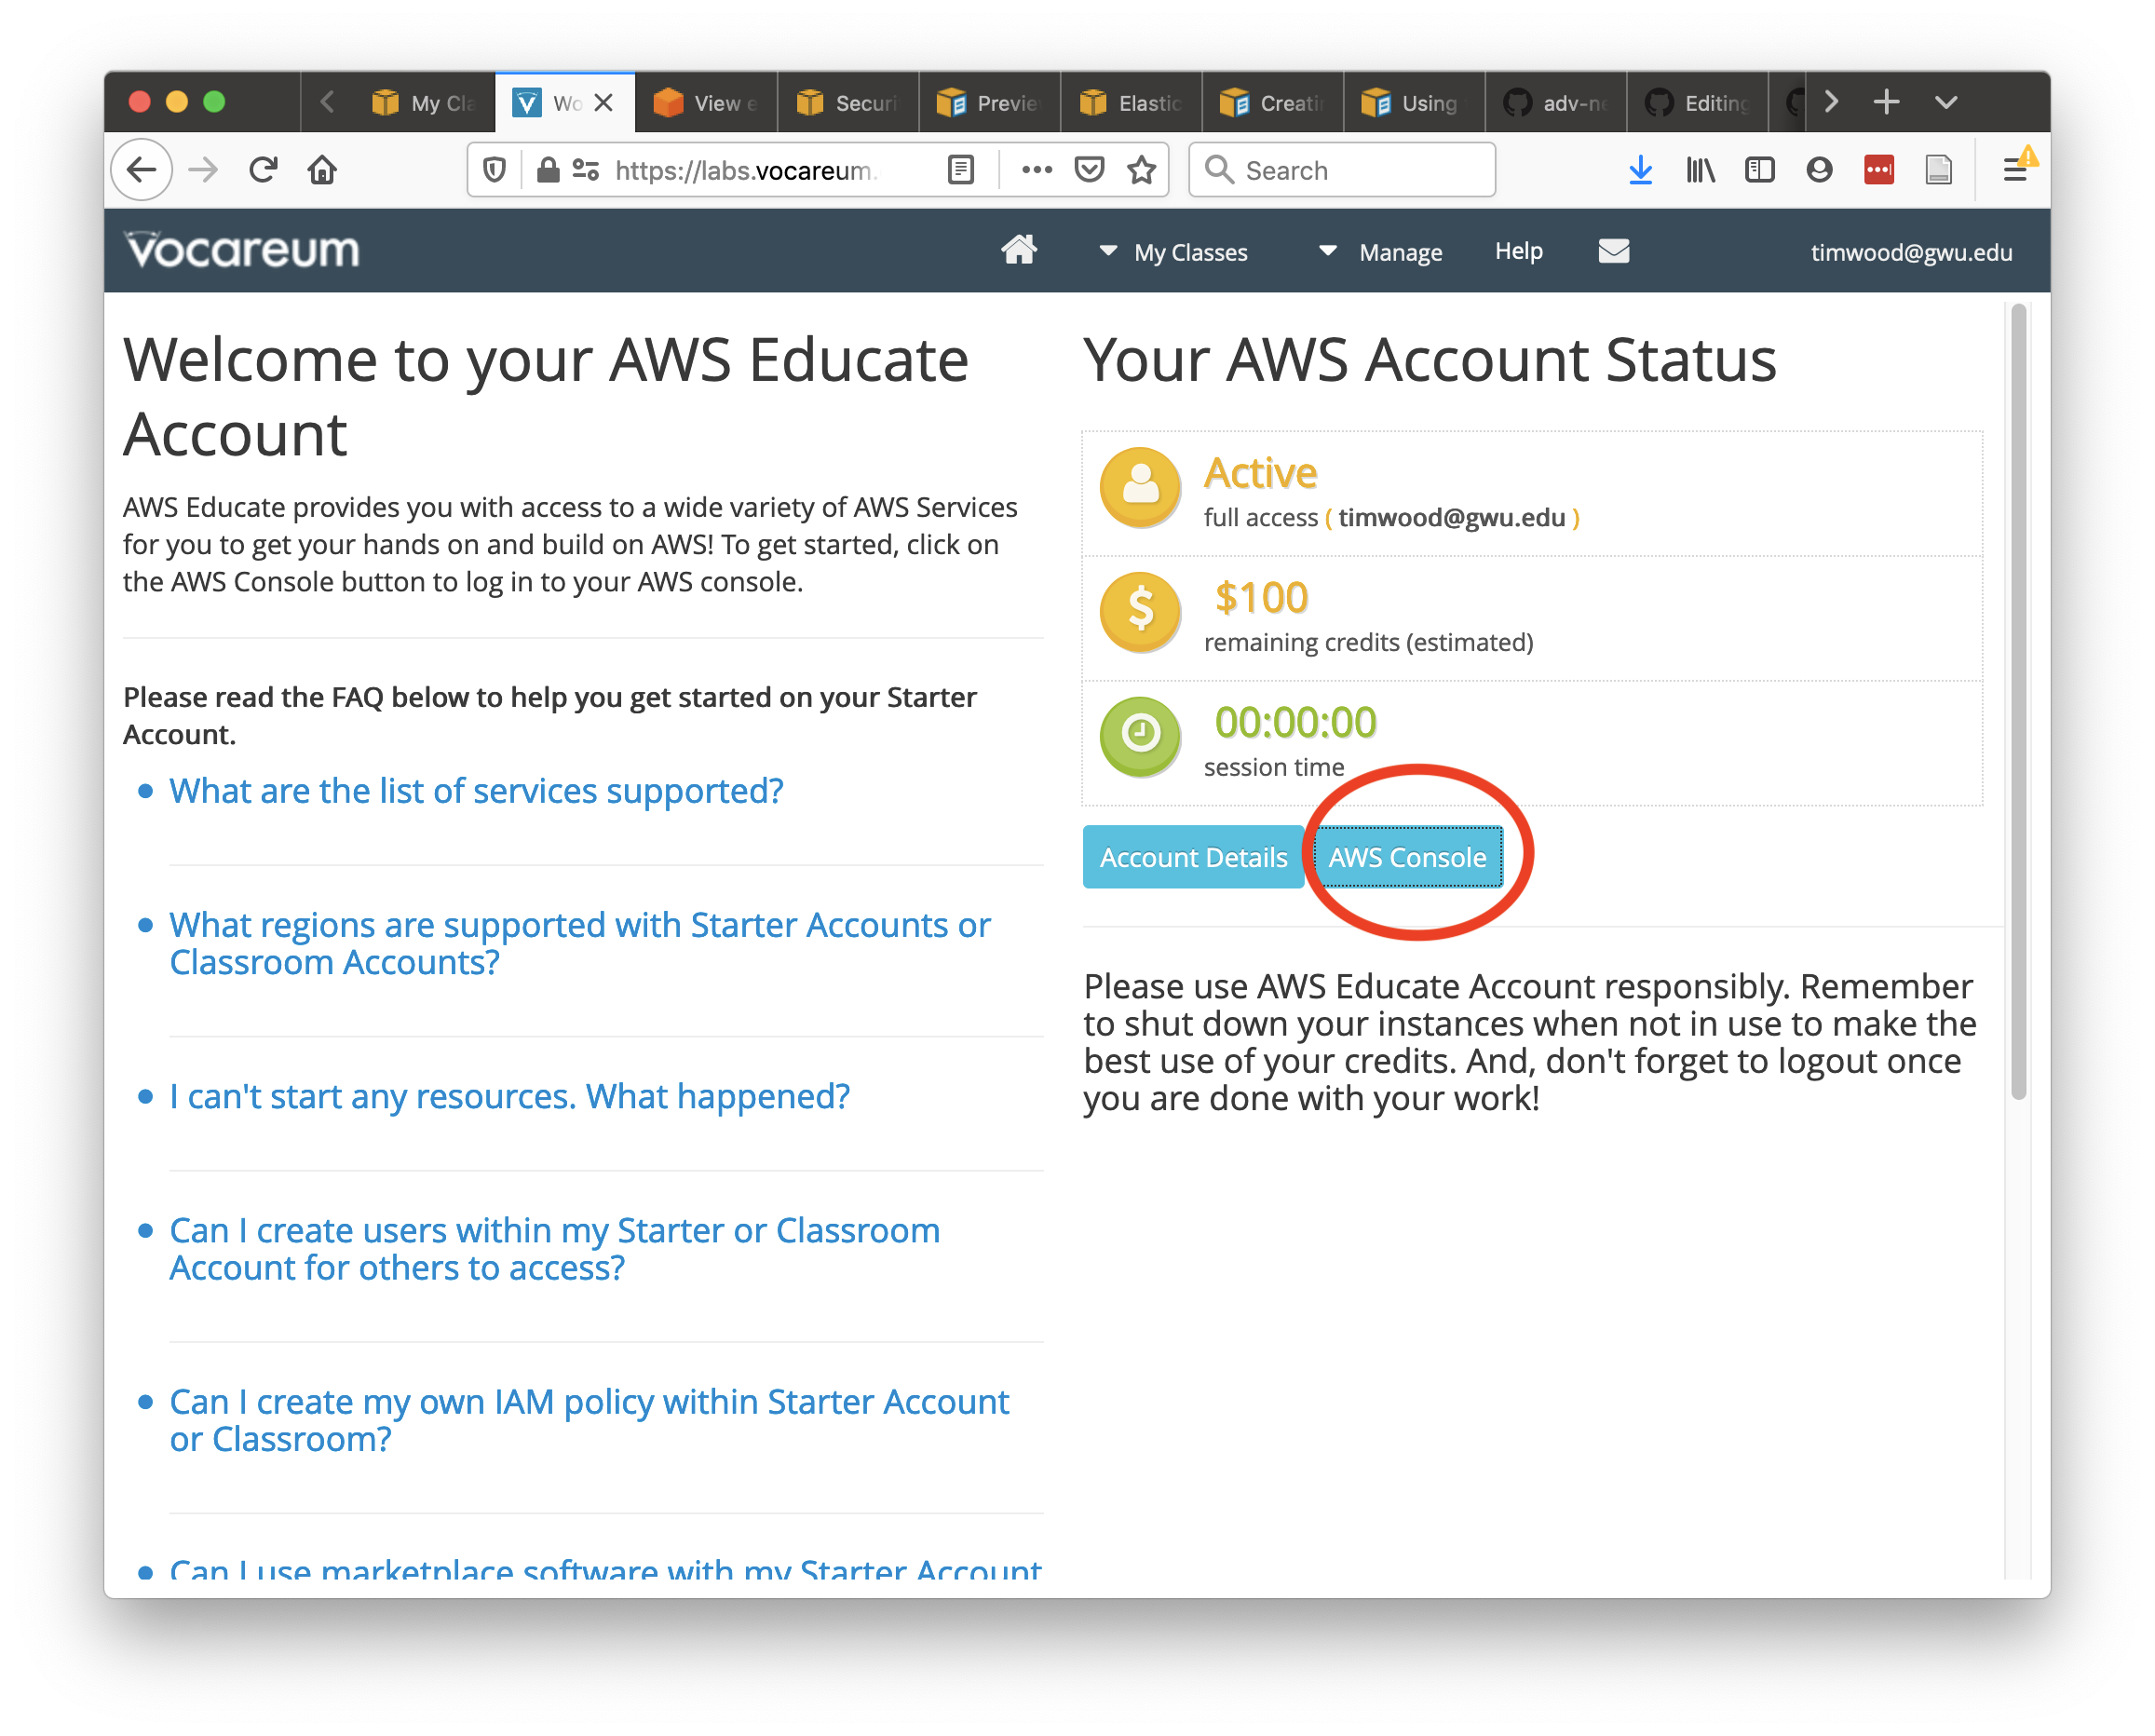
- The next screen should show your current account balance. Click the AWS Console button to start using the service.
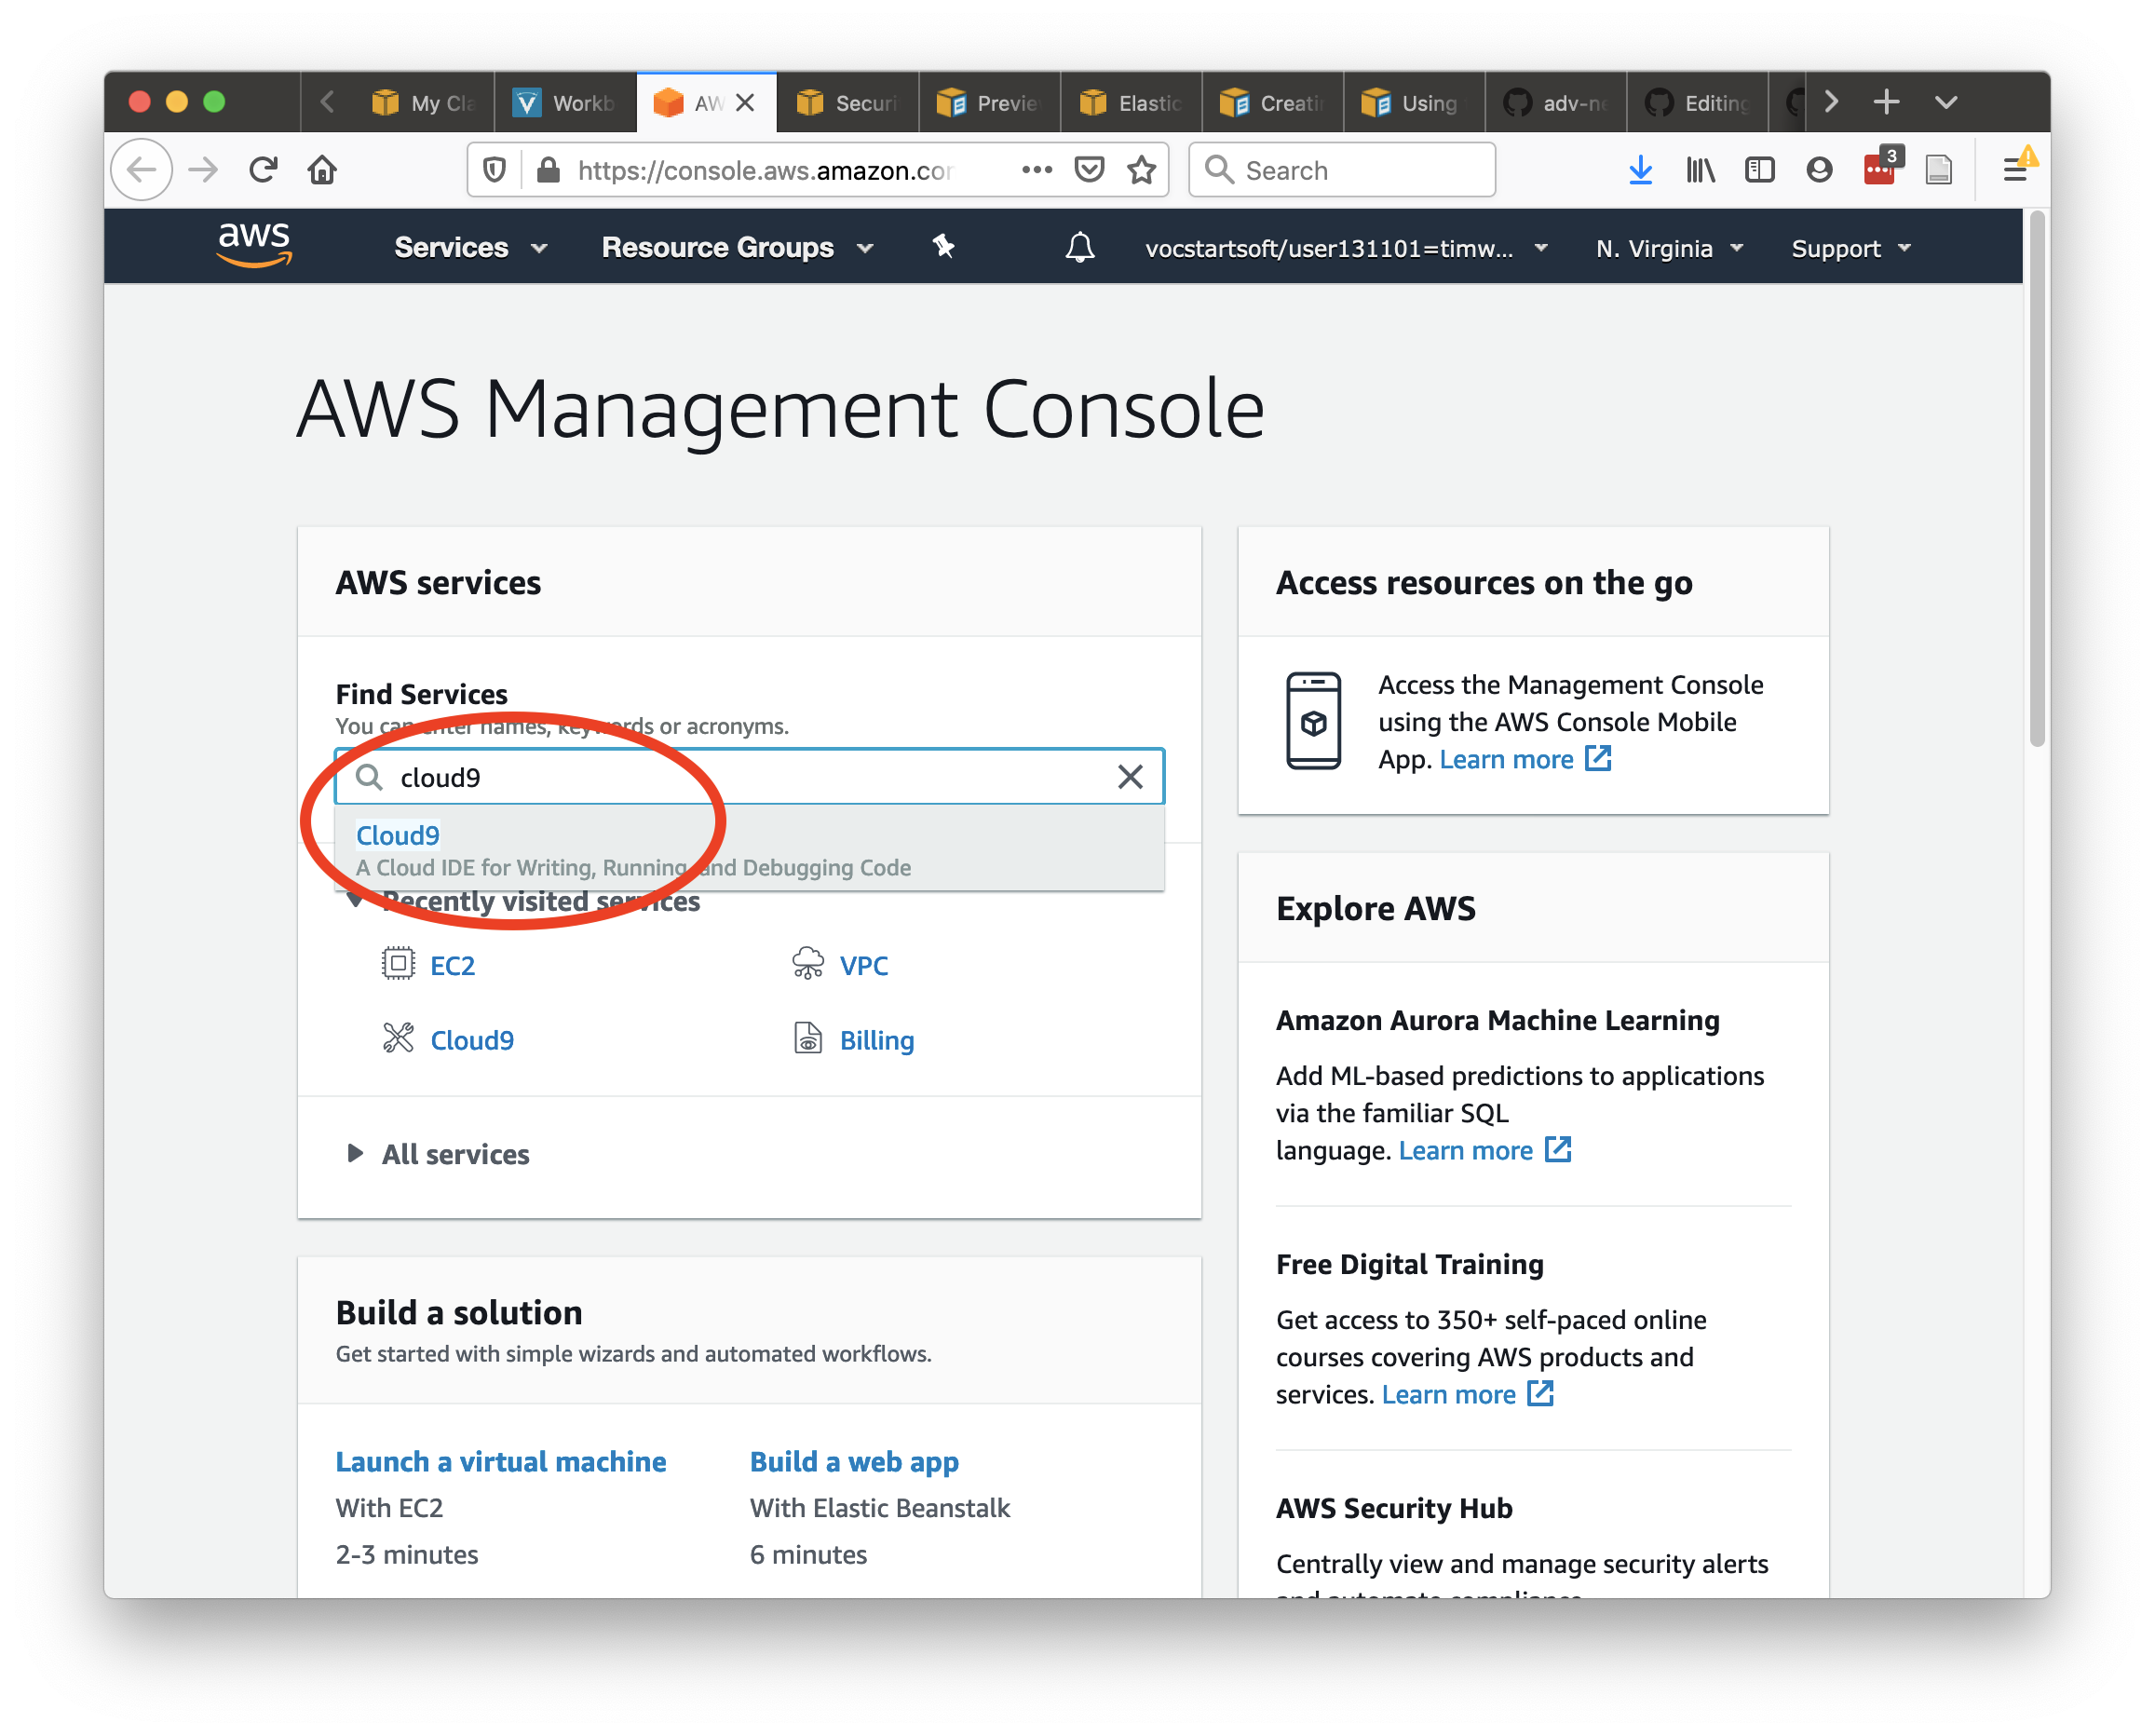
- To access the IDE, type ‘Cloud9’ into the Find Services box.
The screenshots below may help.
Setting up your Cloud 9 Environment
The first time you use C9 you will need to create a new Environment. This will instantiate a new EC2 VM and install a web-based IDE for you to use.
- Click Create Environment in the Cloud9 AWS Page.
- Enter a name and description
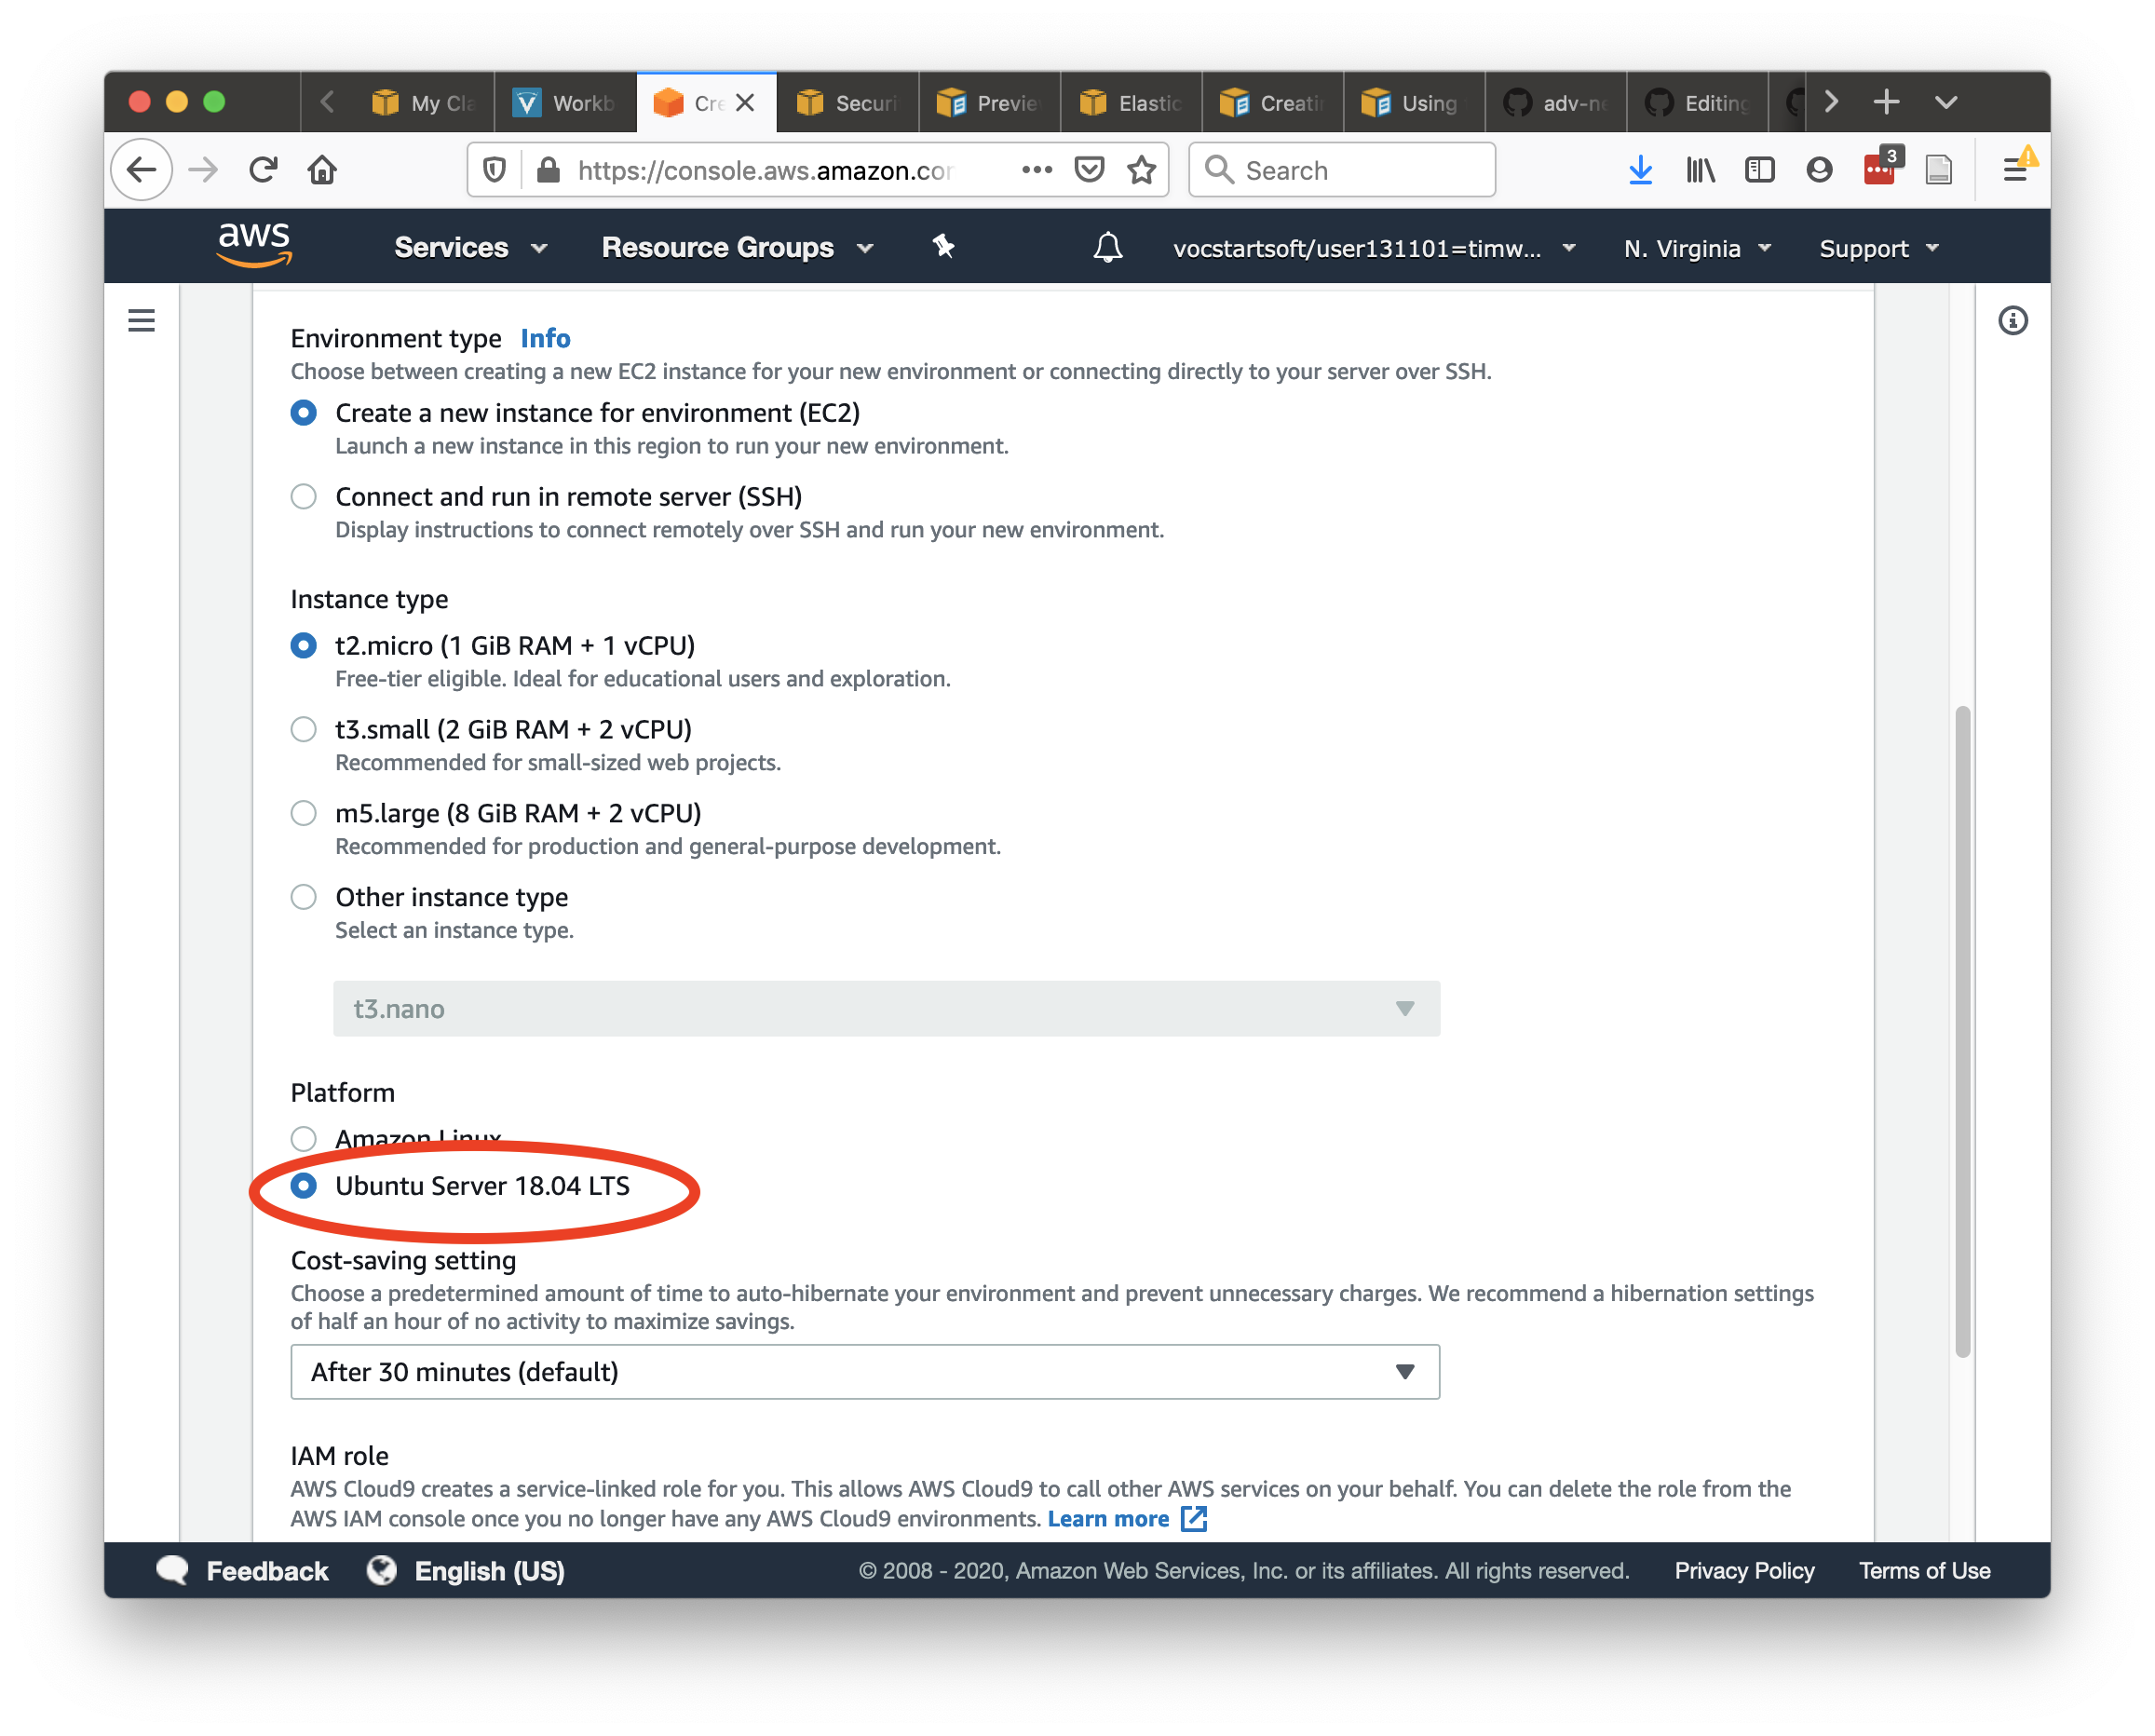
- Configure settings to match the setup below. You should be sure you are using a
t2.microinstance type and you should pickUbuntu Server 18.04 LTSas the OS type. - Confirm to create your environment.
Using Cloud 9
Cloud 9 provides an easy to use web-based text editor and remote console. This simplifies writing and testing your code and gives everyone in the class a consistent environment.
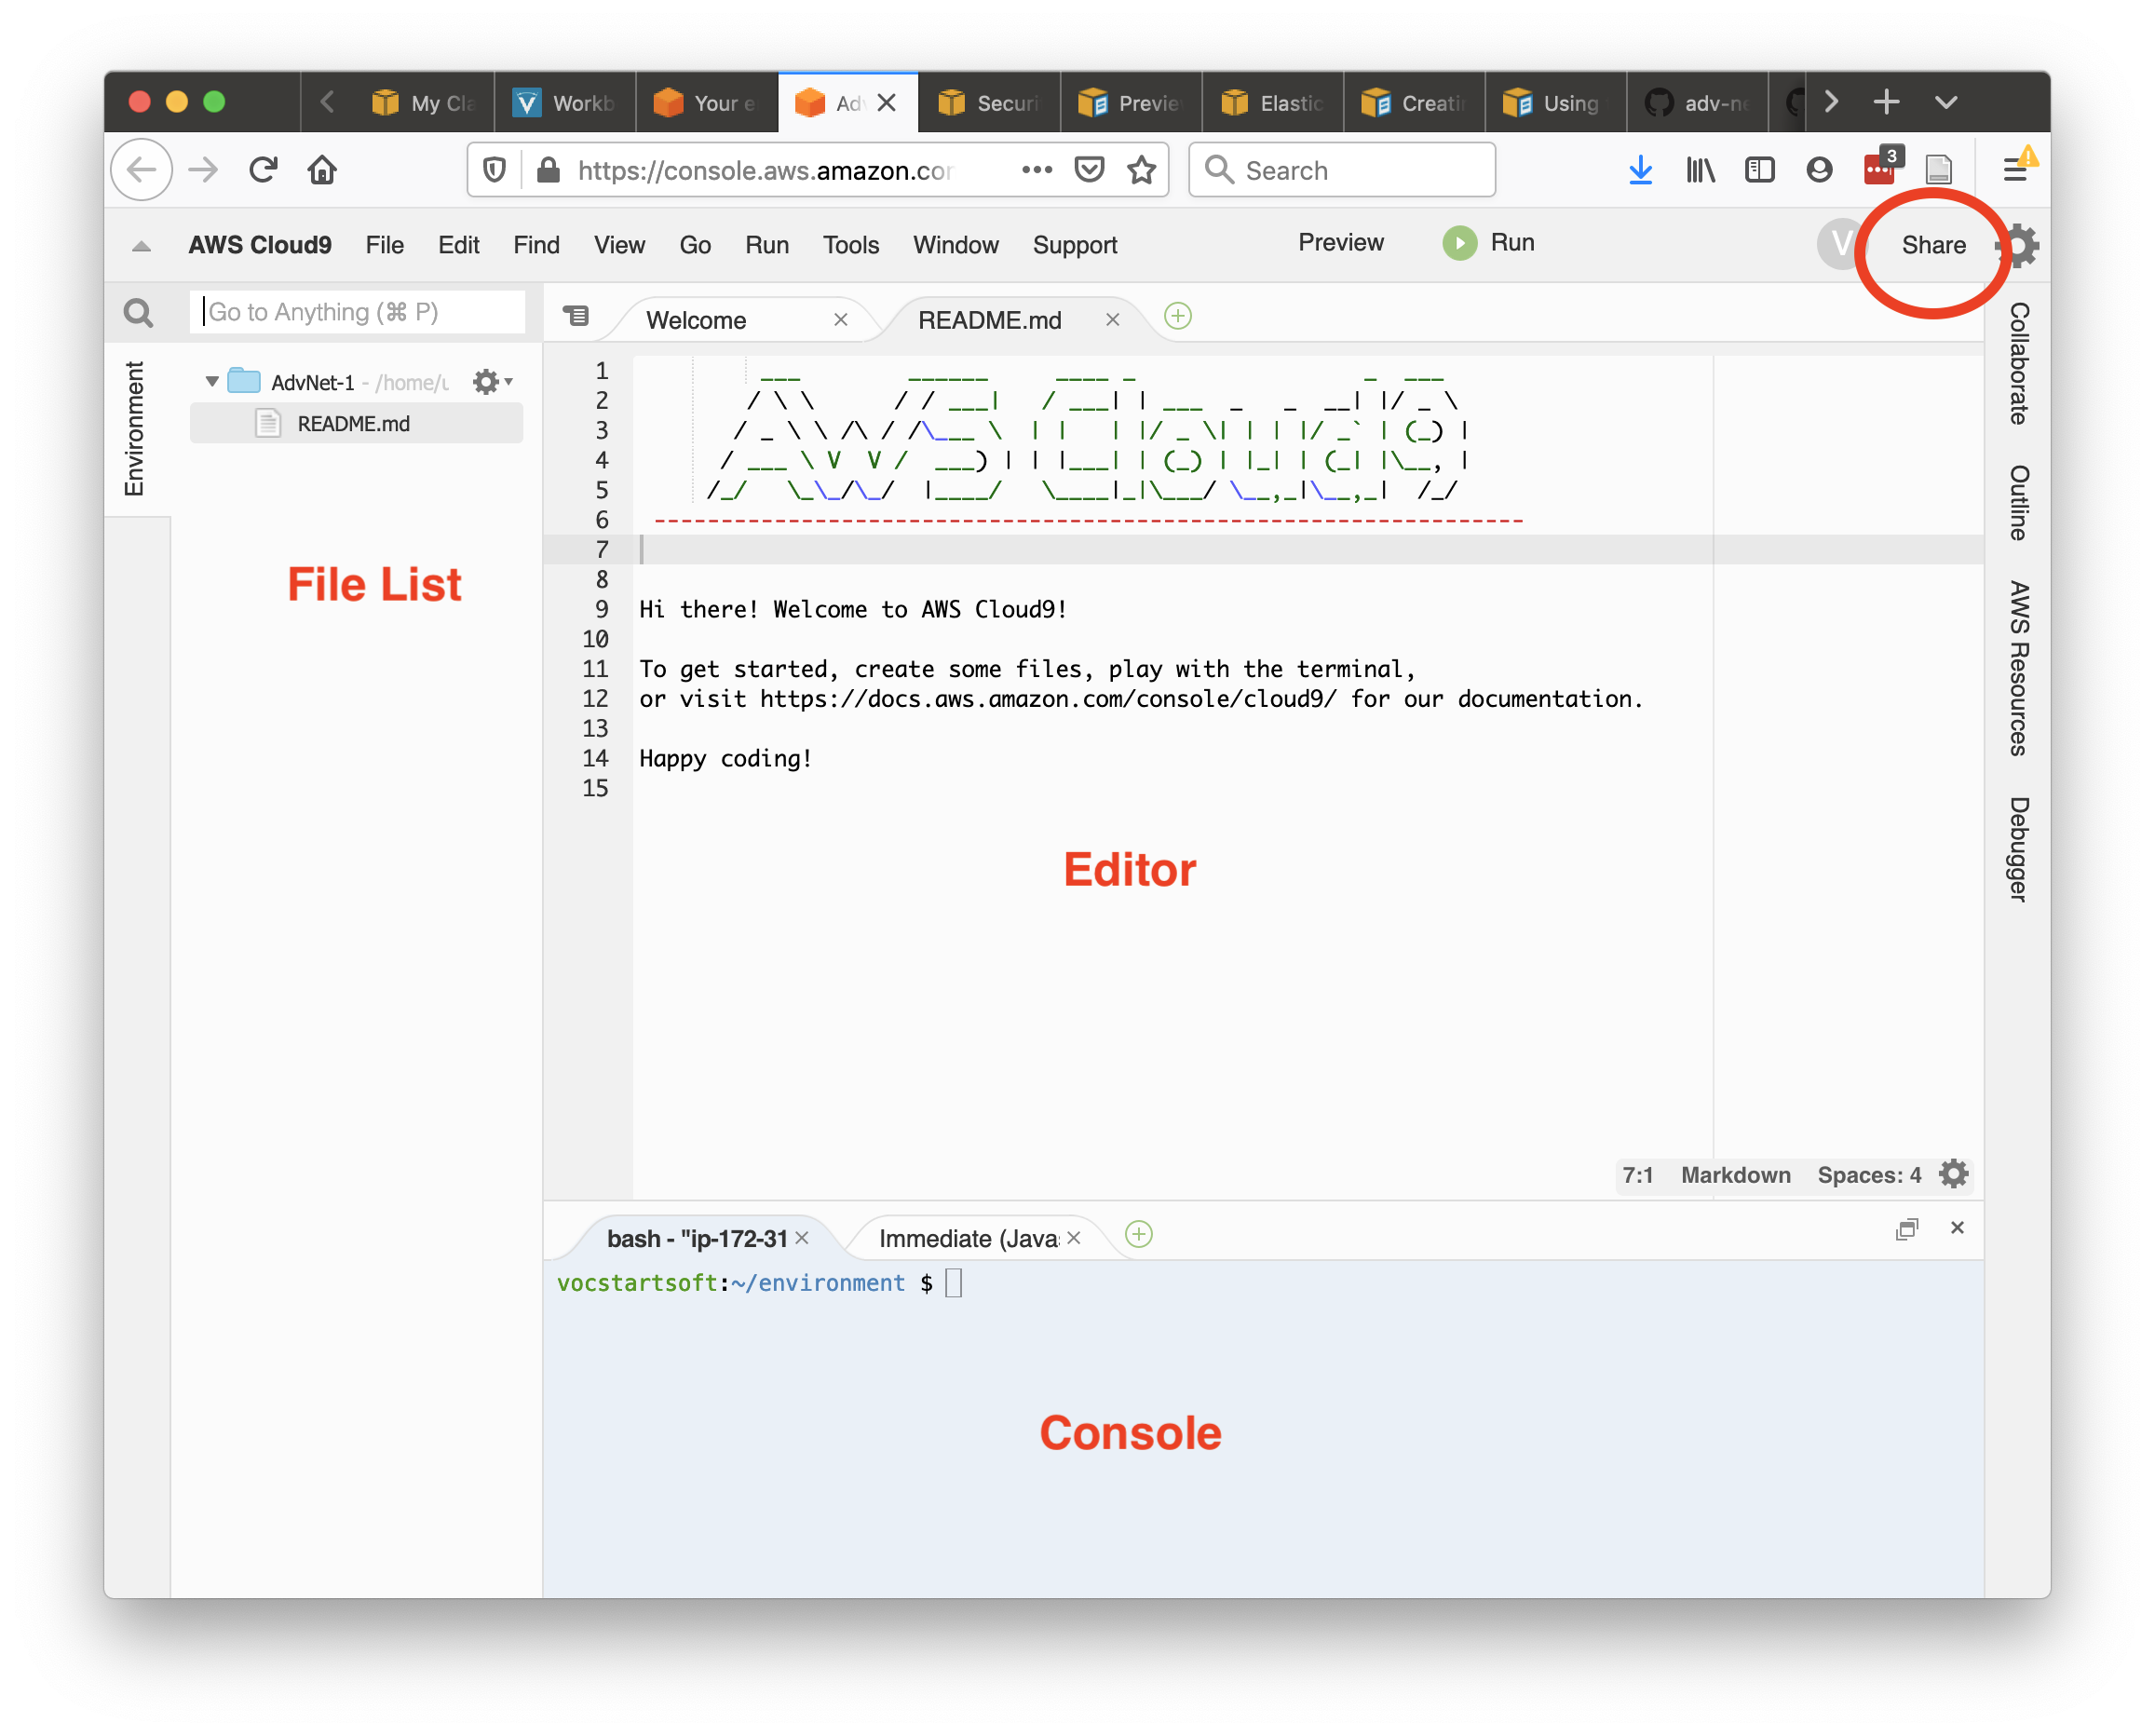
Load your new environment and familiarize yourself with the Editor, File List, and Console panes. Run cat /proc/cpuinfo and cat /proc/meminfo to verify that the VM’s configuration matches the t2.micro instance type.
To obtain the IP address of your Cloud 9 VM, click the Share button and copy the Application field (second image above). Note that by default this IP will not be accessible remotely so you must follow the instructions below.

Adjusting Cloud 9 Security Group Settings
By default, your Cloud 9 VM is securely locked down so that all ports are blocked from the public internet. This prevents you from running a server application and accepting incoming clients.
To open ports, we need to adjust the Security Group settings for the EC2 VM running Cloud 9.
We have provided several scripts that make controlling the security properties of your cloud9 instance easy. They can be found on github in the following repo.
In order to complete many of the course assignments you will need to attach a security group to your instances and then add corresponding rules to open up the necessary ports. This can be done by using the following process:
- The first thing you need to do is clone the scripts repo to your instance:
git clone https://github.com/gwAdvNet20/gw-adv-net-tools.git
- Once you have the scripts repo you next have to create a security group. Security groups are used by amazon to add firewall rules to your instance and control what traffic can access your instance. We provide a script create_public_access_group.sh, that will create a security group named
add-public-access, attach it to your instance and then add a rule to allow pings to reach your instance. You should be able to modify this for future assignments to create generic security groups. You can run it like so:
cd gw-adv-net-tools/
chmod +x -R *
cd aws/security_groups
./create_public_access_group.sh
This will output a security group id, save this so we can use it for later.
To test that your new security group works, issue a ping command against your instance:
# On your cloud9 instance, to get your ip address
$ ./fetch_instance_metadata.sh
Instance Public Info:
Hostname: instance.cloud9.aws.com
IP Address: 10.02.12.31
# On your local computer
$ ping 10.02.12.31

PING 10.02.12.31 (10.02.12.31): 56 data bytes
64 bytes from 10.02.12.31: icmp_seq=0 ttl=56 time=6.771 ms
64 bytes from 10.02.12.31: icmp_seq=1 ttl=56 time=5.835 ms
64 bytes from 10.02.12.31: icmp_seq=2 ttl=56 time=7.282 ms
- Now that you have a security group and attached it to your instance, you can begin to add new rules to your security group. We provide a script add_new_rule.sh that allows you to add new rules to a given security group.
To open port 80 for a webserver, we can run the following command where sg-0ed7adab0169a69d5 is the security group-id, NOT the group name:
./add_new_rule.sh sg-0ed7adab0169a69d5 80
To check that you have successfully add a new rule to your security group you can run the following script to check the rules. This can also be used to fetch your group-id if you forget it. Note: This script uses the group name, NOT the group id.
./fetch_security_group_id add-public-access
You should now be able to communicate with your cloud9 instance over port 80!